How to Add Products
Step 1: Sign into your Seller area
1. Select ‘Sign in / out’:

2. Sign in using your sign in details (you should have received an email when you were approved to be a seller)
3. Read any new messages, then click ‘Add New Product’:

4. Before you start, remember we can’t sell:
1. Copyright items (when things aren’t your own design) or Trademark items (branded items eg Disney)
2. Beauty products or food (unless you can provide safety and/or hygiene certificates)
3. Toys (unless they’ve passed safety exams)
4. Children’s clothing (unless correctly labelled or hand knitted)
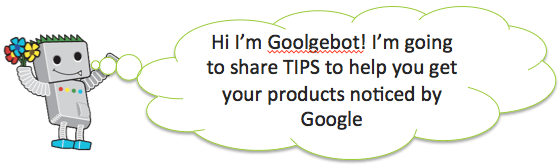
Step 2: Meet Googlebot
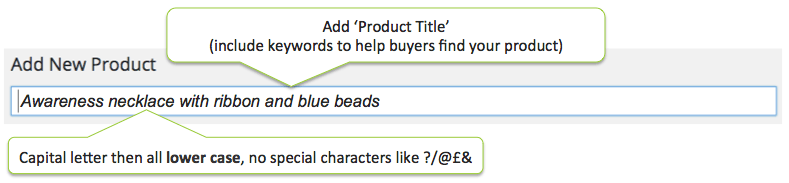
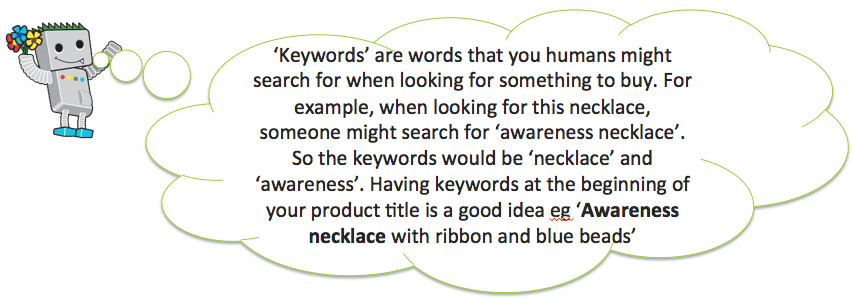
Step 3: Add Product Title
Step 4: Add Long Description

Your long description is every bit of information your customer could possibly wish to know about your product. On the website it appears beneath the Short Description (which you’ll fill in later) and the ‘Add to Basket’ button:

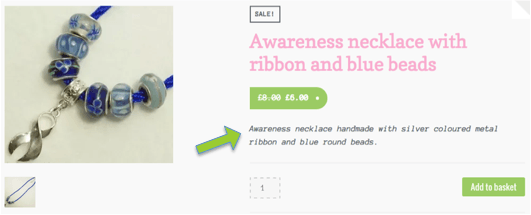
Here’s a great example of what to write:
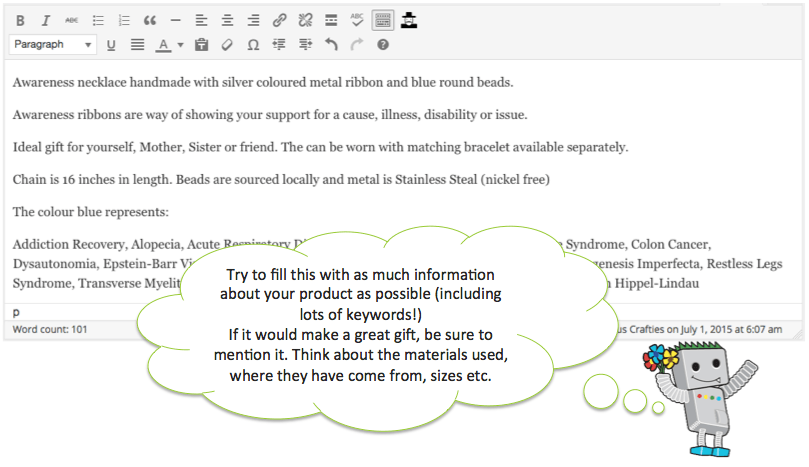
If your product is an Awareness item, its great to add what the colour symbolises (also a fab way to add lots of lovely text and keywords to help customers find your item). Disabled World is a great place to discover what each colour represents 🙂 If you copy and paste their text straight into your description, please remove any links as Google doesn’t like it. Simply select all the text containing the links and click ‘Remove link’:
Leave these boxes unticked:

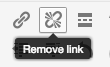
Step 5: Add Price

Step 6: Add Sale Price (optional)
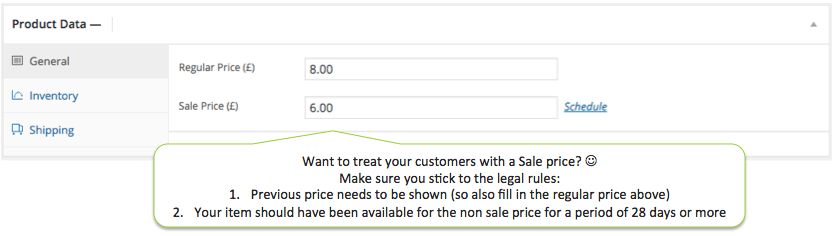
You can also schedule your sales for in the future by clicking the Schedule link and choosing a date range:
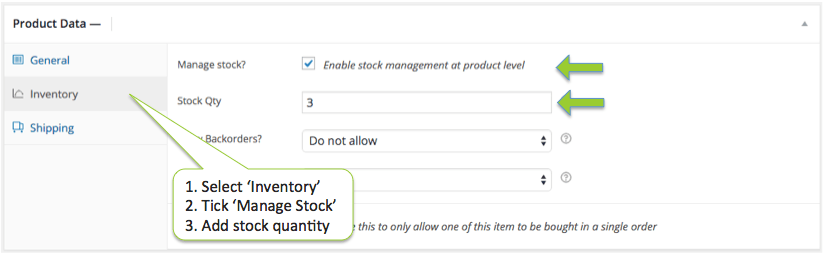
Step 7: Add your Stock quantity (optional)
Ignore this bit if you are able to keep offering the same item. Only fill this in if you intend to make one-off’s, limited editions or if you think you may not be able to maintain stock levels for the materials to make your item.
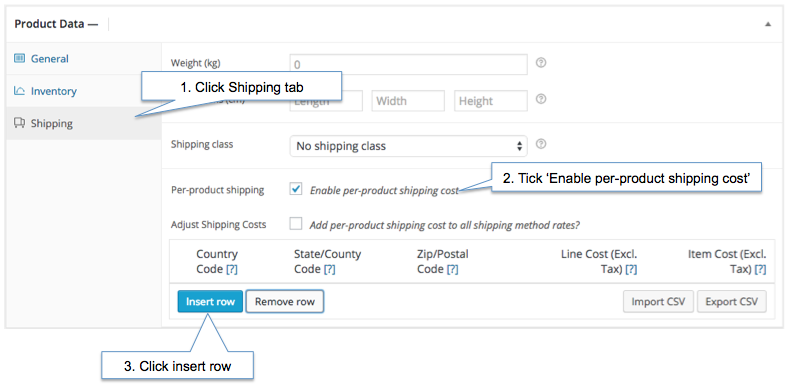
Step 8: Add Postage Costs
You can add postage costs for your own country and overseas (if you post abroad). We recommend offering FREE postage within your own country to encourage sales. Here’s how to add your free and paid postage:
1. Open shipping tab
2. Tick ‘Enable per-product shipping cost’
3. Click the ‘Insert Row’ button
4. In County Code column add your own 2 digit country code. For UK and Ireland insert ‘GB’ (inserting ‘UK’ doesn’t work). If you live outside the UK, find your country code here
5. Add your shipping cost (in UK pounds and pence) in the ‘Item cost’ column
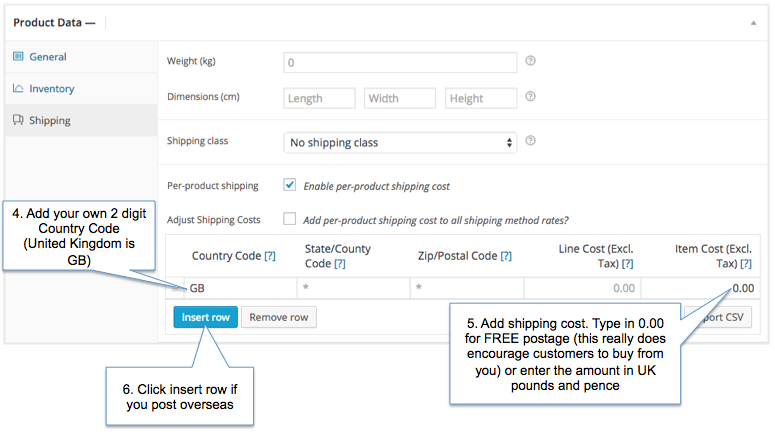
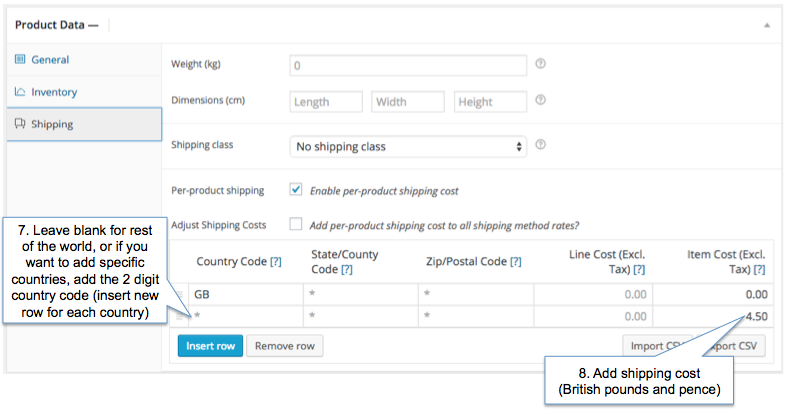
6. (Optional) If you post overseas, you can add additional countries by adding additional rows and inserting the 2 digit Country Code for your chosen country. Or if you have one flat rate for shipping overseas, leave the Country Code blank like this:
Step 9: Add Short Description
The short description can be found here on the website:
So as you can see, its in a very important place just before the magic ‘Add to Basket’ button. Be sure to include all the really important information your customer will need to know about your item. Keep it a bit shorter than your long description.
Step 10: Add Categories
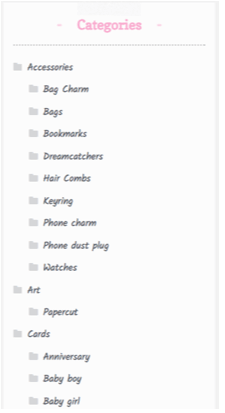
When people visit the Conscious Crafties website and are looking for something nice to buy, they may have an idea of what they are looking for (eg necklace). To browse the Conscious Crafties shop customers can select on the categories to view just the products they are interested in buying:
You can make sure your products appear in the right categories by ticking here:

There are ‘parent’ and ‘child’ categories, make sure you product appears in both – so if you have a necklace, tick the ‘parent’ category ‘Jewellery’ and also it’s child category ‘necklace’.
Customers will also want to shop for gifts, so we have special categories for Gifts too 🙂 Beware of adding too many though, we’ve all had the experience of shopping online and finding totally un relevant products in our search results. People get bored and could leave the website, meaning yours and other Crafties products don’t get seen. So select only the categories relevant to your products:

Need MORE CATEGORIES? – Just ask 🙂
Step 11: Personalisation Box (optional)
Something special for personalised items. If you offer products that can be personalised, you can add a ‘Personalise’ text box to your product page on the website just above the ‘Add to Basket’ button like this:
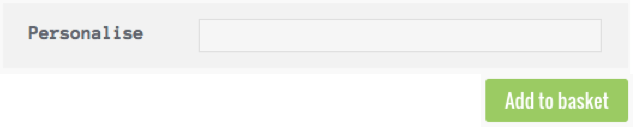
When your product is purchased, the text entered by the customer will appear on your order.
To add this to your product page, all you need to do is tick ‘Personalise’ in the categories list:
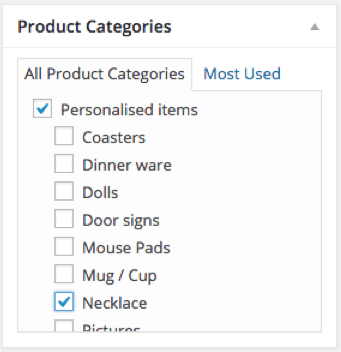
Be sure to also add the child category too eg necklace. You won’t see the personalisation box appear in your seller product page, but don’t worry it WILL appear on the webpage 🙂
Again, if you need another Child category under Personalisation, just ask.
Step 12: Need more personalisation? (optional)
Product options can really make your product stand out. Take our Craftie Kath, she makes beautiful dolls. Each one is handmade to order. Customers can easily select from all the options to ‘Build their Doll’:
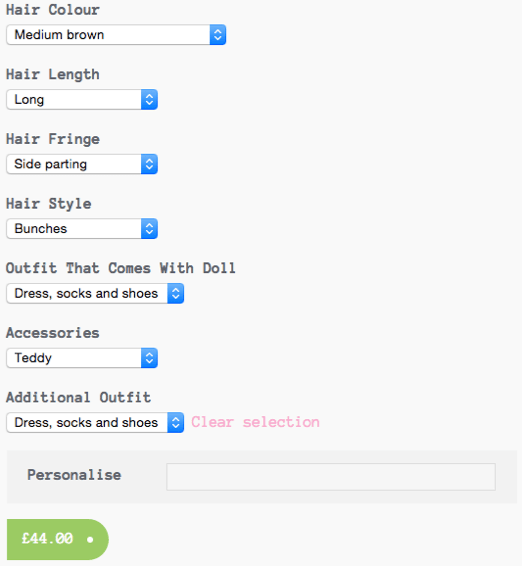
The price is automatically calculated depending on what options the customer has chosen.
This is a great experience for the customer as they can purchase their custom item straight away (before they change their mind!) and makes it easier for us Crafties – as email ping pong can be exhausting!!
If you would like options added to your product(s), think about all the options you are able to provide, then contact Karen (Scooter Angel) via the Facebook group. The options are added for you because they are a little technical to set up.
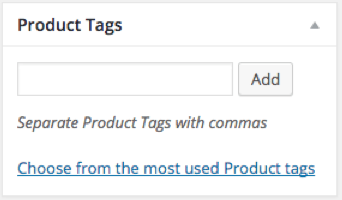
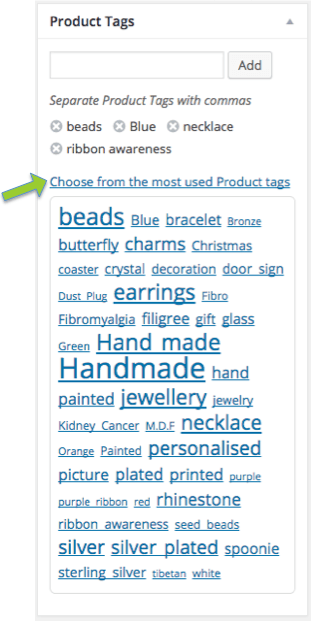
Step 13: Add Tags
Here’s where you add your tags:
For example for the the ‘Awareness necklace with ribbon and blue beads’, my keywords might be ‘necklace, beads, blue, awareness, ribbon etc’. You can add these by typing into the box below and separating them with commas:
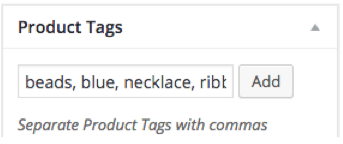
Or even better, choose from existing tags added by other Crafties 🙂
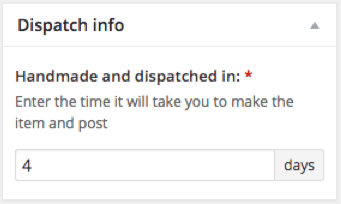
Step 13: Add Dispatch info
Add the number days it will take you to hand make and post the item. Consider, that you may have good and bad days:
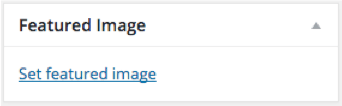
Step 14: Add product images
Your Featured image will be your best photo that really shows your product off well:
Select ‘Set featured image’:
Then select the ‘Upload files’ tab, followed by the ‘Select files’ button. Choose your image from your computer:
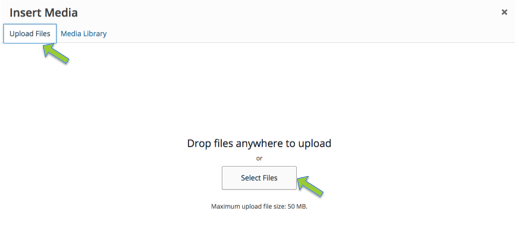
Then click ‘Set featured image’:
![]()
If have additional images, click ‘Add product gallery images’ and follow steps above for adding pictures:
Step 15: Submit for review
To ensure your products are listed in the best way possible to sell your handmade items, each product is submitted for review before publishing. We also add some magic to help potential buyers find your items on Google. Your product will be live on Conscious Crafties within 48 hours 🙂

How to Amend Products
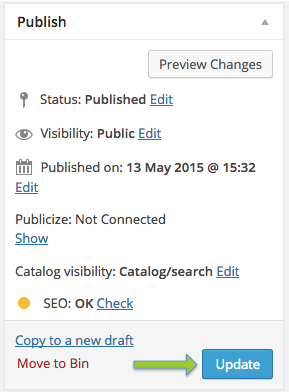
Sign in to the Seller Portal as before, read any new messages, then click Edit Product’:

Make changes to your product, then click ‘Update’: